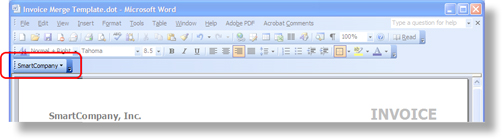
SmartCompany WordSmart is a Word toolbar that loads
SmartCompany data right into your Word documents. The image below shows the toolbar as it
appears in Microsoft Word 2003. The toolbar is also fully compatible with Word 2000 and XP.
WordSmart has 3 primary functions:
- Assisting in the creation of SmartCompany-aware merge templates
- Retrieving existing templates from your SmartCompany Document Library
- Merging SmartCompany data into merge templates
WordSmart does its work entirely within Microsoft Word, making its own secure
connection to SmartCompany so you don't need to use your Web browser to perform
document merges.
Why Document Merging?
Every business requires a set of standard documents to do its work. Examples include
proposals, statements, invoices, fax cover sheets, and so on. Many businesses create
boilerplate templates for their documents using Microsoft Word, then distribute these
templates to the employees who need them. SmartCompany facilitates this process by
providing a
document library where shared documents can be stored and
accessed by any SmartCompany user.
Some documents require standard bits of information that can be found in SmartCompany, such as
the name, address, and phone number of a Contact, or the pricing and line item information
found within an Opportunity. Without document merging, users must look up the information they
need in SmartCompany, then re-key that information into their document. This is obviously a
time-consuming and error-prone process.
Document merging automates the process of copying SmartCompany data into Word documents.
Users simply choose their document and choose their SmartCompany data, and then SmartCompany
does the rest. Quite simply, document merging greatly enhances user productivity while making
your SmartCompany data available from within any Word document.
Document Merge Workflow
Creating and using merge documents with SmartCompany requires only a few simple steps:
- Create document merge templates based on new or existing Word documents
- Store the merge templates in your SmartCompany Document Library (optional)
- Open a merge template in Word for the documentation task at hand
- Use WordSmart to choose SmartCompany data to merge into the template
- Run the merge
Understanding Merge Templates and Merge Tags
A
Merge Template is simply a Microsoft Word document that contains special
placeholders for SmartCompany data. These placeholders are called
Merge Tags.
A merge tag consists of a SmartCompany data element name enclosed between the characters
« and
». At merge time, these tags are deleted
and replaced with the corresponding SmartCompany data elements.
Here are some sample merge tags:
- «Contact.DisplayName» — A contact's name as written; e.g., "John Doe"
- «Opportunity.TotalSellPrice» — The total sell price of an opportunity
- «OrdLineItem.UnitCost.2» — The unit cost of an order's second line item
Merge tags exist for every major data element in the SmartCompany database:
Accounts, Contacts, Projects, Opportunities, and Orders. There are also tags for the
current User and Organization, so you can insert data about yourself and your company into your merge templates.
Although there are hundreds of tags, you don't need to learn, memorize, or even type them because the toolbar
lets you point and click to choose the tags you want and insert them into your documents.
Creating a Merge Template
You can create a merge template from a new, blank document, or you can convert any existing document into
a merge template. In this example, we'll create a simple merge template from scratch that displays information
about a contact.
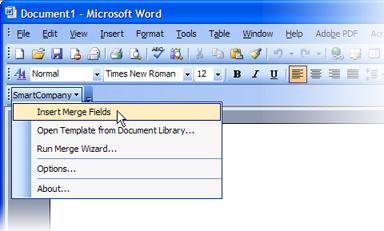
- Open Microsoft Word. A blank Word document appears.
-
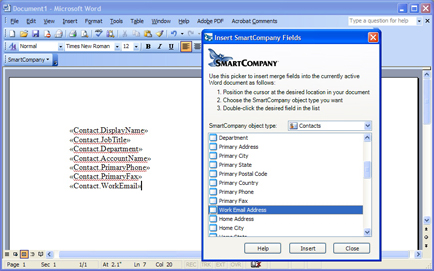
Click on the SmartCompany menu and choose Insert Merge Fields.
The Insert SmartCompany Fields window appears – we call this window the Field Picker:
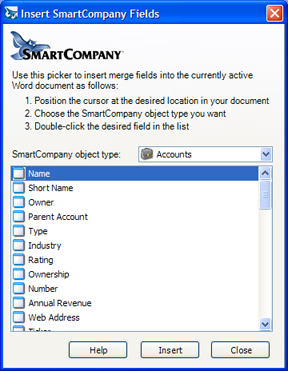
Position this window so you can see your document beneath it.
-
Change the SmartCompany object type from Accounts to Contacts.
Notice how the scrolling list below changes to show all the data elements for a contact.
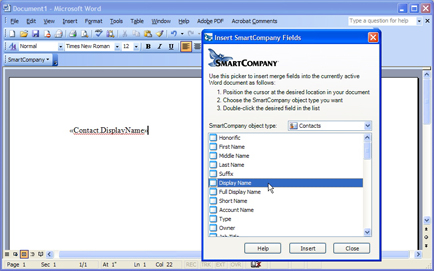
-
In the scrolling list of data elements, double-click Display Name.
Notice how the associated merge tag appears in your document at the location of the blinking cursor:
- Click on your Word document to make it active, then click Enter to begin a new line.
-
Use the Field Picker to insert other Contact fields into your document. Put each field on its own line.
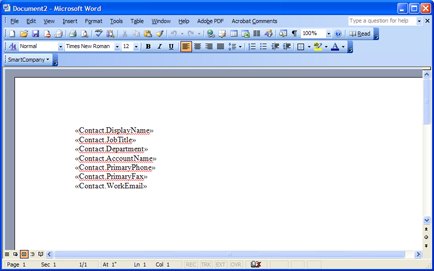
After adding a few fields, your document should look similar to this:
- Close the Field Picker.
-
In Word, click File->Save.
Change the Save as type to Document Template (*.dot).
Click the Desktop button.
Name the document Contact Merge Template.dot.
The Save dialog should look similar to this:
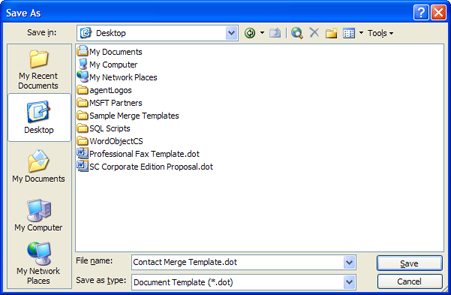
Click Save.
- Close the Word document.
Storing a Merge Template in the Document Library
If you store your Merge Templates in the Document Library, they will be available to you and
other users from any location that has an Internet connection. Merge Templates stored in the
Document Library can be downloaded from a Web browser or from WordSmart.
(Note: You must have a SmartCompany Corporate subscription to use the Document Library.)
To store a Merge Template in the Document Library, follow these steps:
- Open a Web browser and log into your SmartCompany account.
- Click the Document Library link on the left side of the screen.
- Click the New button at the top of the document list.
-
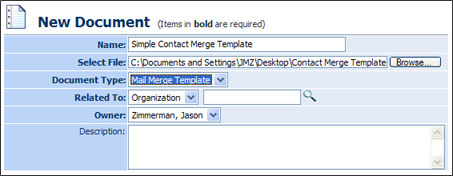
Fill out the fields on the New Document screen. The example below
shows how to fill out the fields for the simple contact merge template we created in the
previous section.
Note the following important details:
a. The document must be a Word document (.doc or .dot).
b. The Name can be anything you want.
c. Use the Browse... button to locate the Word file on your computer.
d. The Document Type must be set to Mail Merge Template.
e. The Related To must be set to an Organization with a blank name.
f. The Owner can be anyone in your organization.
g. Enter helpful information about the template in the Description area.
After filling out the form, click Save. The template is now stored in your Document Library.
Opening a Merge Template
Use the
File->Open command in Microsoft Word to open a template located on your computer.
To open a Mail Merge Template stored in your Document Library, follow these steps:
-
Set your SmartCompany login options if you haven't already done so.
-
Click the SmartCompany menu and choose Open Template from Document Library....
WordSmart logs in to SmartCompany, examines your Document Library, and displays a list of Mail Merge
Templates similar to the following:
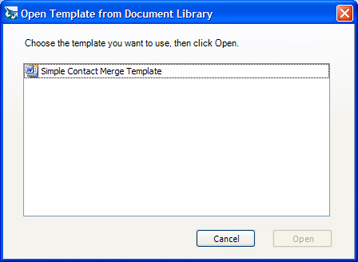
- Click the desired template and then click Open. A copy of the template is downloaded to your computer and opened in Microsoft Word.
Running the Merge Wizard
To run the Merge Wizard, you must have a valid merge template open in Word, and it must be the active Word document.
In this example, we'll run the Merge Wizard using the simple contact merge template we created in a
previous section:
-
Set your SmartCompany login options if you haven't already done so.
-
Click the SmartCompany menu and choose Run Merge Wizard....
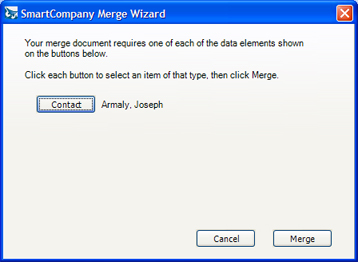
The Merge Wizard analyzes your merge template to see what kind of data is required, then presents
a screen similar to the following:
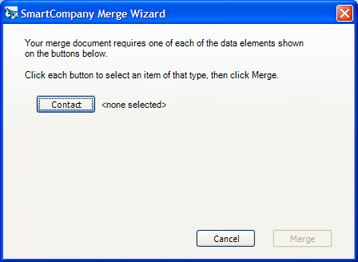
In this example, the merge template requires Contact data only, so only one button called
Contact appears. If additional data elements were required (Account, Project, Opportunity or Order), the Merge
Wizard would display buttons for those elements as well. However, the Merge Wizard never displays
buttons for User or Organization; data for those elements is
always available.
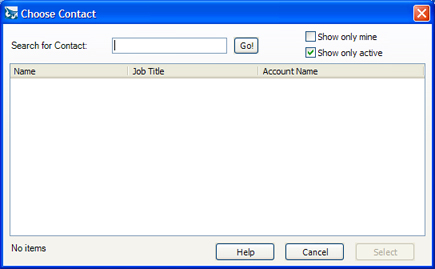
-
Click the Contact button. A search dialog for Contacts appears:
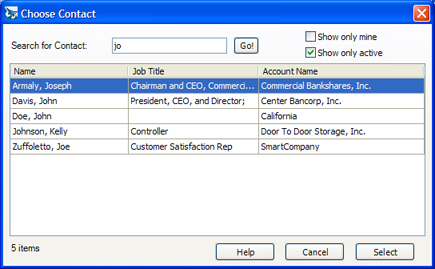
-
Enter the partial first or last name for a contact into the search box, then click Go!.
The screen below shows a search for contacts whose names contain "jo":
-
Click the name of the desired contact, then click Select.
The Merge Wizard dialog is updated to reflect the choice you made:
-
Repeat steps 2 through 4 for any remaining data elements you might have.
-
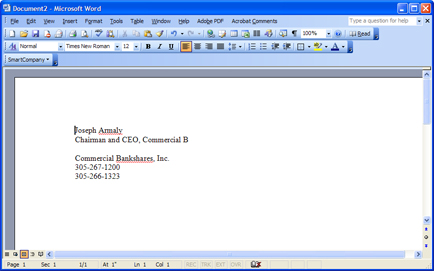
Click Merge.
The Merge Wizard closes, and after a few moments your merge template is updated with the data you selected:
Setting Your Options
WordSmart must log in to your SmartCompany account in order to do its
work. Follow these steps to record your login information so you won't have to enter it every
time you use the toolbar:
-
Click the SmartCompany menu and choose Options....
-
Fill out the form with your SmartCompany login information as shown below:
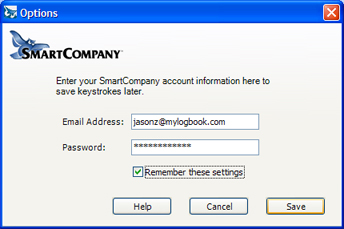
-
Click Save.
Your settings are securely encrypted and safely stored on your computer.